Phase 2: Adds
The phase will start after the Warrior of Light casts the first Specter of Light. He then goes untargetable and begins to fill up a Limit Break bar from 0 to 100. Reaching to 100 acts as an enrage for Ultimate Crossover.
Two adds will spawn at the start of this phase:
- Spectral Dark Knight (West)
- Spectral Warrior (East)
These must be picked up by Tanks and kept separated or else they will tether and become unkillable.
Roughly 5 seconds later an untargetable Spectral Bard, Spectral Black Mage, Spectral White Mage and Spectral Ninja will spawn and begin their mechanics. Check your aggro list for their casts to get familiar with timings.
First the Spectral Bard casts Deluge of Death. All DPS will get a Flare marker that they must take away to ensure survivable damage. DPS going to their corners is a safe bet, however, some strat variations allow for Melee DPS to retain uptime. Ranged and Casters can preposition before the mechanics come out.
As this happens the Spectral Dark Knight will cast Blade of Shadow and the Spectral Warrior will cast Fatal Cleave. Tanks must mitigate these busters.
Both Healers will be targeted by the Spectral Ninja with Katon: San — a stack mechanic that give them Fire Resistance Down II. This is important as it means they cannot resolve the tower mechanic which also deals Fire damage. Healers must stack with someone until Katon: San resolves.
Two towers will have spawned in the center East and West after the Spectral Black Mage finishes casting Twincast. These towers require 2 people to resolve each.
After Deluge of Death hits DPS, whoever is stacking for Katon: San must move to their respective Healers while the others not stacking move in to the towers to be hit with Meteor Impact. You have a few seconds to resolve this.
The Spectral Summoner will have summoned 4 untargetable Spectral Egi (NotBahamut) adds in each corner. As the towers finish resolving these adds will create tethers attached to players to indicate who they will cast their Flare Breath on. Those who took the Katon: San stacks must take these tethers to their respective corners due to their lower Fire Resistance Down II, facing the NotBahamuts away from the rest of the party.
Both the Spectral Dark Knight and Spectral Warrior will also be casting Deep Darkside and Berserk respectively. These must be silenced/interrupted. A little later they will then both cast another Blade of Shadow and Fatal Cleave if they are still alive.
DPS Corners, Healer + Tank Stack, DPS Towers, Healer + Tank Tethers
This variation on resolving the Flare, Tower and Tether mechanics is a strategy deemed a current standard that was used in earlier clears.
While it loses some DPS uptime on adds it is likely to be the strategy most currently asked for in all regions.
All DPS take their Flare markers to their corners for Deluge of Death.
Healers + Tanks stack together for Katon: San.
After DPS Flares resolve, DPS move in to take Meteor Impact Towers.
Healers + Tanks then take the Flare Breath tethers to face their respective corners.
5 Reasons Why You Should Play Dragoon/DRG (Lancer)
44495
841
76
00:10:10
14.06.2022
It really took me a second time and a different type of content,
but I fell in love, more than ever before.
However, here are some more ideas, why other jobs are great as well:
5 Reasons To Play RPR: 🤍
5 Reasons To Play BRD: 🤍
5 Reasons To Play SAM: 🤍
5 Reasons To Play BLM: 🤍
5 Reasons To Play NIN: 🤍
5 Reasons To Play SMN: 🤍
5 Reasons To Play DRK: 🤍
5 Reasons To Play RDM: 🤍
And for some Live Floor Tanking and Target Killing in PvP with a Dragoon:
Twitch: 🤍
And a big «Thank You» to all those, supporting me on Patreon,
YOU are breathtaking: 🤍
You can get Final Fantasy XIV here:
• FFXIV: Endwalker: 🤍
• Complete Edition (30 days included): 🤍
• 60 days Subscription card: 🤍
My Gaming/Recording setup:
• CPU — (Intel I9 12900k): 🤍
• GPU — (Asus RX 6900XT TUF Gaming): 🤍
• Display — (Asus PG32UQ): 🤍
• Rec/Mic — (PreSonus Revelator Dynamic): 🤍
• Headset — (HyperX Cloud II Wireless): 🤍
• Keyboard — (Logitech G915 TKL Linear): 🤍
• Mouse — (Razer Naga X): 🤍
• Webcam — (Razer Kiyo Pro): 🤍
• Speaker — (Razer Leviathan): 🤍
The links provided are linked to my
Amazon Affiliate account at no extra cost to you
Music:
Masayoshi Soken — Primogenitor, Revenge Of The Horde, Roar Of The Wyrm
FINAL FANTASY, FINAL FANTASY XIV, FFXIV, SQUARE ENIX, and the SQUARE ENIX logo are registered trademarks or trademarks of Square Enix Holdings Co., Ltd.
ENDWALKER, SHADOWBRINGERS, STORMBLOOD, HEAVENSWARD, and A REALM REBORN are registered trademarks or trademarks of Square Enix Co., Ltd.
2010 — 2021 SQUARE ENIX CO., LTD. All Rights Reserved.
LOGO ILLUSTRATION: 2010, 2014, 2016, 2018, 2021 YOSHITAKA AMANO
Timestamps
0:00 Introduction
0:26 Disclaimer
0:51 1st Reason
1:48 2nd Reason
3:00 3rd Reason
4:27 4th Reason
5:59 5th Reason
7:46 Some Disadvantages
9:15 Closing Thoughts
#FFXIV #Endwalker #Dragoon
Spectral Thief
Attacks:
Spectral Dream – Multi-hit tankbuster.Spectral Whirlwind – Unavoidable room-wide AoE.Dash – Spectral Thief charges up a wide circle AoE, and tethers to a marker on the ground. When time (indicated by the green orbs around him) expires, he’ll dash to that point and the AoE will go off. Move away from the marker to avoid.Unnamed target attack – Everyone is marked with a targeted AoE. Spread out so you don’t overlap damage.Chicken Knife – Summons four knives. Shortly thereafter, everyone is targeted with a line AoE (Coward’s Cunning). Stick together until the target lines appear, then split up to avoid.Shadowdash – Used in conjunction with Chicken Knife. Similar to Dash, but with two target markers instead, and may be a line AoE instead of a circle. This AoE will go off both at both target markers.
![]()
Those two markers indicate that the line AoE will go off at both points.
Strategy:
Not that difficult, but Spectral Thief is probably the boss I had the most trouble with in The Heroes’ Gauntlet. There are just a few bits that you might need to see once before you understand them.


Dash might catch you out the first time if you don’t know it’ll actually go off at the target marker and not at his position. Chicken Knife/Shadowdash is arguably his most troublesome combination, though, especially if he also combines this with his targeted AoE attack. It’s very helpful to stack up when Chicken Knife is cast just to maximize the amount of safe space you have from those attacks, because Shadowdash will likely take up 70% of the arena by itself. If that unnamed target AoE is dropped on everyone at the same time, then you really need to use that space to ensure nobody gets hit with anything.
Nobody can afford to get hit by too many of his avoidable attacks: the vulnerability stacks will build up quickly. Other than that, just mitigate damage as best you can, and be ready to heal. Fairly standard Final Fantasy XIV fare.
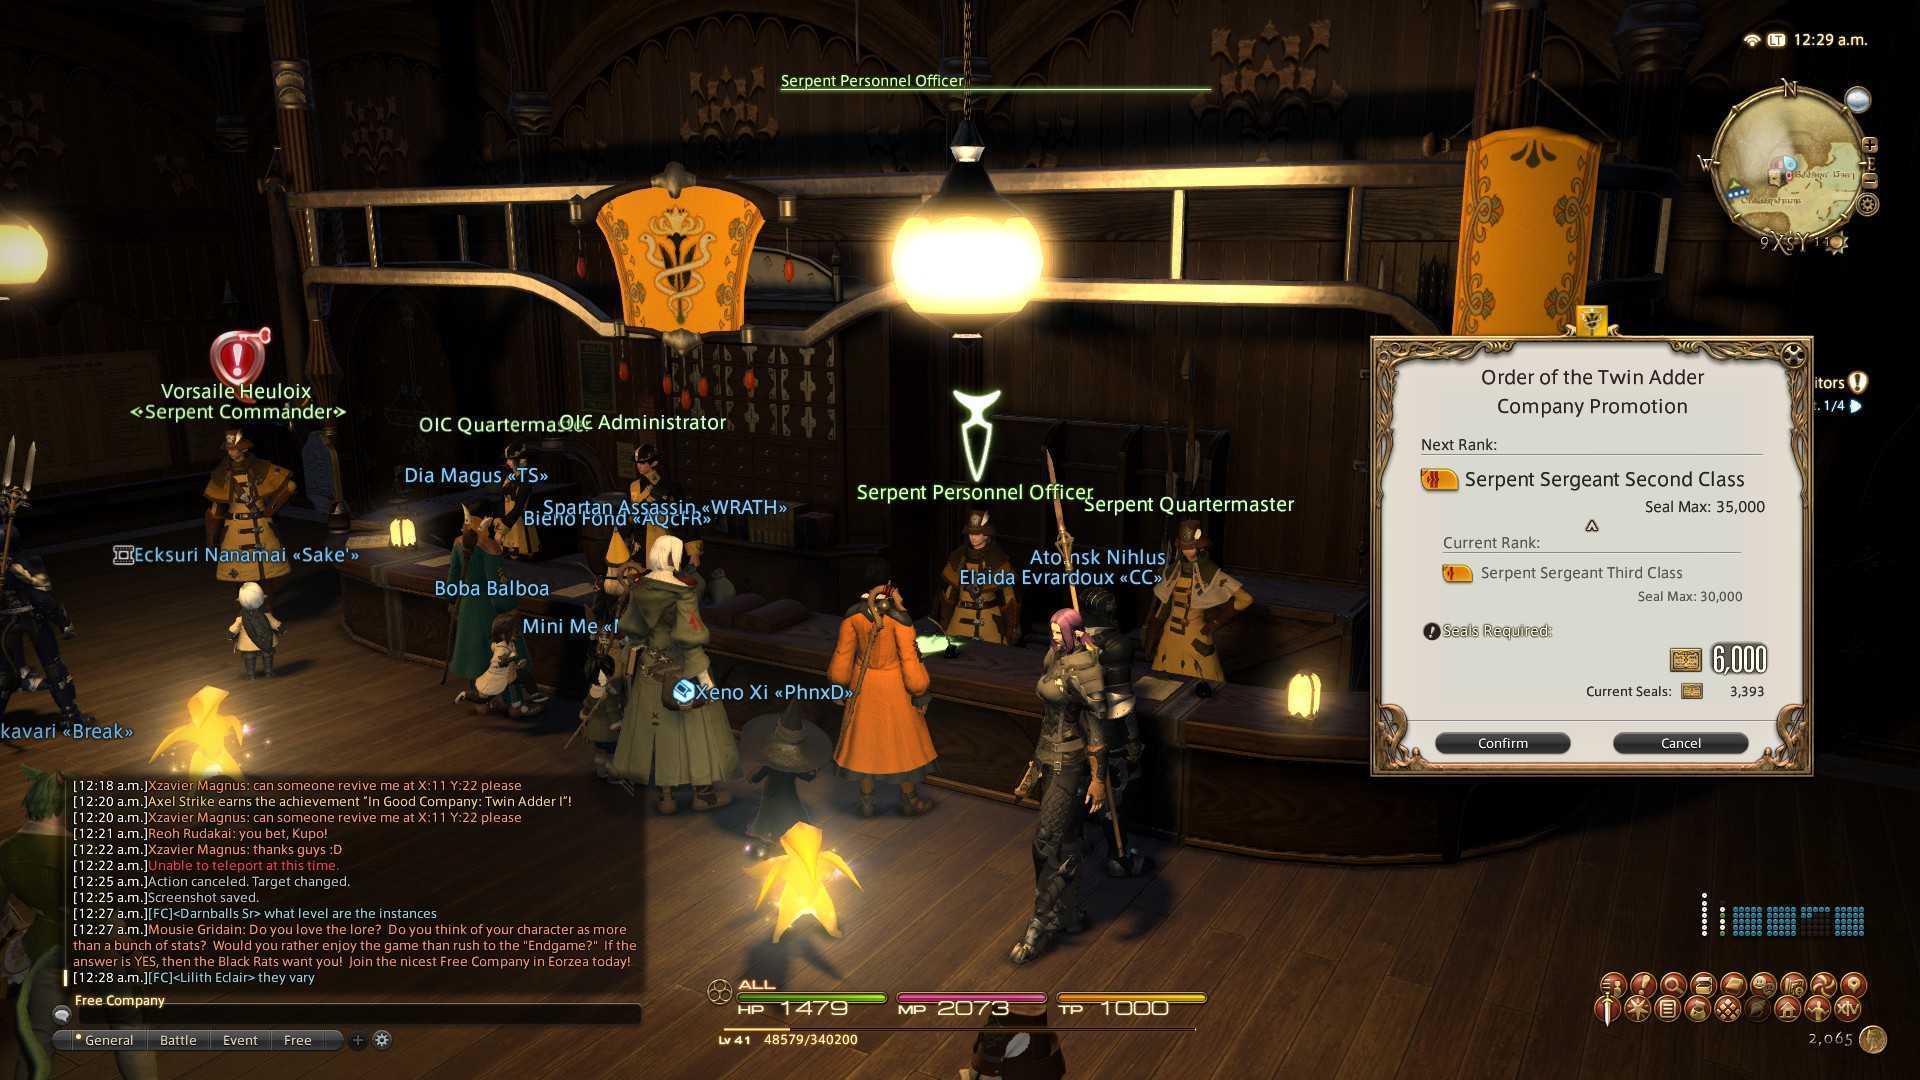
Общая информация об Охоте в FF14
Задания Охоты представляют собой особые поручения, цель которых – уничтожить опасных монстров, свободно разгуливающих по Эорзеи. Принимая участие в Охоте, можно получить различные ценные награды, включая Allagan tomestones, особую валюту дополнений и, конечно же, очки опыта. Фактически, поручения такого рода являются отличными источником опыта, поскольку они обновляются ежедневно.
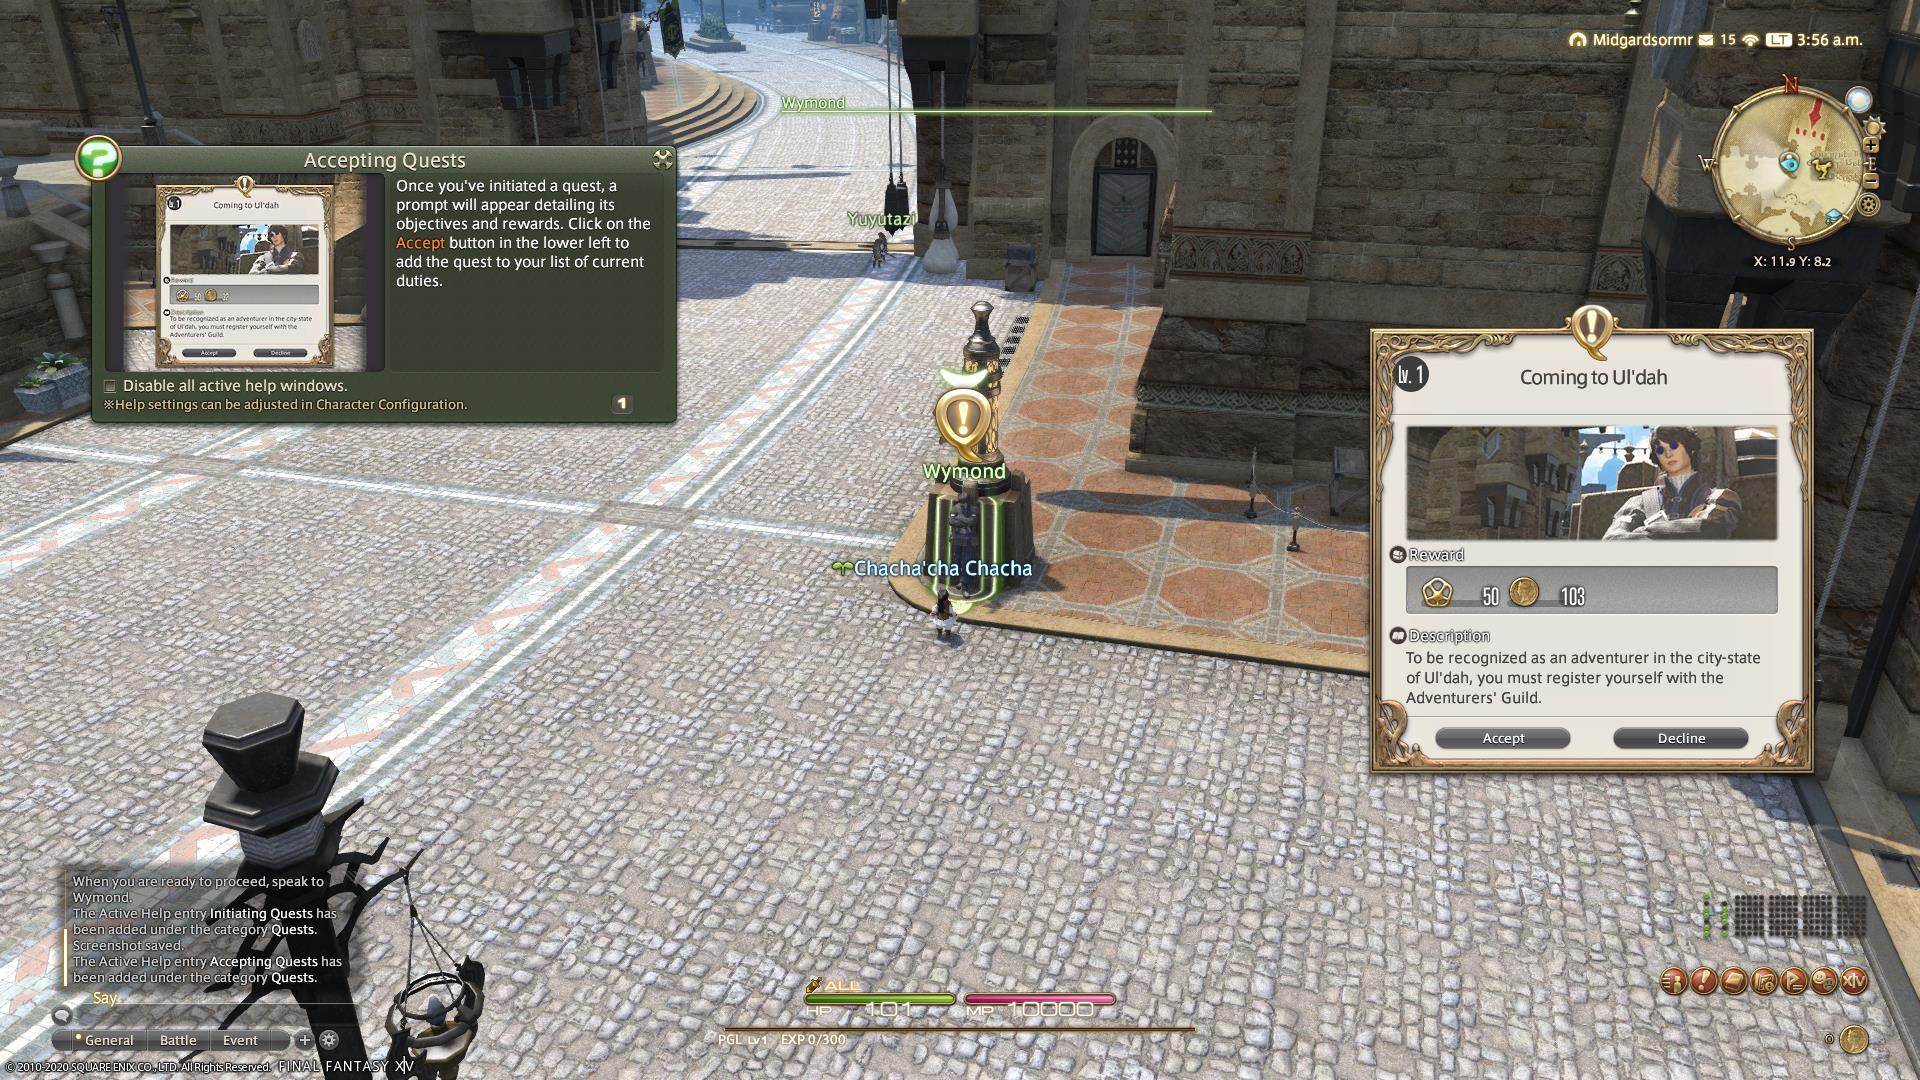
Как разблокировать Охоту в Final Fantasy 14
Чтобы получить возможность выполнять ежедневные задания Hunts вам нужно присоединиться к одной из гранд-компаний Эорзеи. Сделать это можно на 20 уровне MSQ. Достигнув указанного уровня, вы получите квест сюжетной линии, который приведет вас в гранд-компанию. Более подробно о гранд-компаниях вы можете прочитать в этом гайде.
Если вы уже присоединились к какой-либо военной организации, достигните звания «Second Lieutenant» и возьмите в штабе задание «Let the Hunt Begin». Это быстрый квест, по завершению которого вы разблокируете Охоту.
-
Охота в A Realm Reborn. Задания Охоты в этом дополнении разблокируются автоматически после выполнения квеста «Let the Hunt Begin» в штабе гранд-компании;
-
Охота в Heavensward. Задания Охоты в этом дополнении называются «Clan Marks» и могут быть разблокированы во время прохождения сюжетной линии Heavensward. Поручения Clan Marks делятся на четыре уровня сложности, каждый из которых открывается после выполнения определенного квеста. Чтобы получить доступ к Охоте в Heavensward, вам нужно выполнить задание «Let the Hunt Begin» в гранд-компании;
-
Охота в Stormblood. Задания Охоты в этом дополнении называются «Veteran Clan Hunts» и могут быть разблокированы во время прохождения сюжетной линии Stormblood. Как и в предыдущем случае, они делятся на четыре уровня сложности, каждый из которых открывается после выполнения определенного задания. Чтобы получить доступ к Охоте в Stormblood, откройте Охоту в штабе гранд-компании и сделайте квест «Elite and Dangerous» дополнения Heavensward;
-
Охота в Shadowbringers. Задания Охоты в этом дополнении называются «Nutsy Clan Hunts» и могут быть разблокированы во время прохождения сюжетной линии Shadowbringers. Они также поделены на четыре уровня сложности и каждый них открывается после выполнения определенного задания. Чтобы получить доступ к Охоте в Shadowbringers, откройте сначала Охоту в штабе гранд-компании, а потом сделайте квесты «Elite and Dangerous» в дополнении Heavensward и «Elite Veteran Clan Hunt» из Stormblood;
- Охота в Endwalker. Endwalker – грядущее обновление в Final Fantasy 14. На сегодняшний день у нас нет информации о том, какие требования необходимо выполнить для разблокировки Охоты в дополнении 6.0. После выхода Endwalker мы обновим этот гайд.
Step 5: How to augment your Law’s Order weapons
Augmenting your Law’s Order weapons will boost its item level to 515 and give it a special glowing effect. This part was added in patch 5.45.
To obtain the augmented version of your Law’s Order weapons:
- Complete all of the steps above.
- Accept the side quest “The Resistance Remembers.”
- Turn in the 18 Haunting Memories of the Dying and 18 Vexatious Memories of the Dying.
- Accept the repeatable quest “A New Path of Resistance.”
- Collect and turn in the 15 Timeworn Artifacts.
The pink Haunting Memories of the Dying drop from Shadow of Mhach alliance raids and FATEs in Gyr Abania. The yellow Vexatious Memories of the Dying drop from Return to Ivalice alliance raids and FATEs in the Far East.
After getting all 36 memories once, you will not have to do this part again for subsequent weapons. Doing FATEs for the memories is much faster than doing raids, but memories do not drop guaranteed from completing FATEs, so you may hit frustrating unlucky streaks.
Timeworn Artifacts drop from doing Palace of the Dead and from doing Bozja’s Delubrum Reginae raid.
Дерево тонкостей специализации
| Ссылка на сборку Wowhead |
| Таланты дерева специализаций скрытности | |
|---|---|
| Первый ряд |
|
| Ряд второй |
|
| Третий ряд |
|
| Четвертый ряд |
|
| Пятый ряд |
|
| Шестой ряд |
|
| Седьмой ряд |
|
| Восьмая строка |
|
| Девятый ряд |
|
| Десятый ряд |
|
ПОДРОБНЕЕ
Импорт специализации Subtelty Строка:
BUQAOB/7AZ//CwQOf4fPMswHVDAARJBAAAAAAQISSSiIEggkgkkEJSSkSSSkAUSCIRaBAAAA
Основными талантами любого скрытного разбойника являются Мрачные тени, Густые жуткие и Затененные завершающие приемы. Все это значительно увеличит ваш урон. Эти трое дополняют друг друга, и вы увидите, как ваши критические числа с легкостью взлетят.
Выдающиеся таланты
- Danse Macabre: Танец теней увеличивает урон, наносимый атаками, генерирующими и расходующими комбо-очки, на шесть процентов и увеличивается еще на шесть процентов для каждой другой используемой атаки.
- Мрачный клинок: пронзите цель Уроном от темной магии, минуя броню. Критические удары применяются Поиск слабости сильный> в течение десяти секунд.
- Темная тень: «Танец теней» увеличивает урон еще на 30%.
Пока вы повышаете уровень, сделайте все возможное, чтобы изучить деревья талантов и найти то, что лучше всего подходит для вас. По пути вы даже можете обнаружить уникальную сборку, которая может оказаться полностью подавленной, поэтому изучите деревья талантов’ Способности очень полезны.
Хорошая сторона этой новой комплексной системы дерева талантов заключается в том, что вы можете изменить свои таланты в любое время, и это позволит вам легко исследовать и открывать новые сборки.
Acknowledgment
Authors:Ramza Beoulve’ (awesomeuno#7660)
Special thanks to:
LeviLevi’s Discord
Mox Xinmagar (Mox#0007)For the WAR guide that was cloned, slaughtered and modified to make this guide, and for helping me format and pretty it up.
Rin Karigani (Rin Karigani#0015)Extremely powerful tank who I have stalked logs of for optimization and speedrunning, as well as being an Ultimate Tank friend.
Ari (AriNeedsAUsername#2514)Math wizard who graciously let me use his mitigation cheatsheet.
Demon (Demon#2000)Has helped me learn a lot of in’s and out’s of Dark Knight, and provided his Optimization guide to help improve this one.
Nethar (nethar#5308)For letting me use her weaving infographic.
Aho Senpai (Aho Senpai#0818)Utilized his site to build the images for the various openers.
Tank_gen friends (Various discord profiles)Jaden, Tonto, Hopps, Runyst, Forgotten Freedom, Torael, Sizzy, Pazu, Zana for being excellent friendos.
Снаряжение
По мере прокачки снаряжение будет раздаваться направо и налево. Убедитесь, что вы выполняете как можно больше квестов и убиваете редких порождений.когда вы найдете их, вы будете уверены, что будете настроены на свое приключение до 70. Если вы участвовали в Рейдах и Эпохальный + в Shadowlands, вы, возможно, не должны заменить свое снаряжение примерно до 65-го уровня.
Поскольку вы носите кожаную броню , разбойник, вы можете подобрать снятие шкур драконьего полета и Кожевенные рабочие профессии. По мере повышения уровня этой профессии вы сможете создавать довольно примечательные предметы. Если вам не нравятся профессии, не стесняйтесь потратить немного золота на аукционе, чтобы купить изготовленное снаряжение, если вам нужны дополнительные уровни предметов.
Экипировка эндшпиля 70-го уровня
В рамках подготовки к первому сезону Эпохального+ и рейдов лучше всего запустить Героические подземелья, убийства мировых боссов и крафтинг. Созданное снаряжение поможет вам получить достаточно высокий уровень предмета для прохождения обычных подземелий, чтобы затем вы могли проходить героические подземелья. Мировые боссы — это бросок костей, так как вы никогда не знаете, выпадет ли из них то, что вам нужно. Проходя подземелья и продвигаясь к героической сложности, вы сможете моментально подготовиться. На данный момент это лучшая экипировка для Разбойников Скрытности и где ее можно добыть.
| Слот | Элемент | Расположение |
|---|---|---|
| Шея | Ожерелье из кости клыкаара | Лощина из орлиной шкуры |
| Голова | Корона ревущей бури | Рубиновые бассейны жизни |
| Плащ | Мамонт-тренерs Drape | Нелтарус |
| Плечи | Мантия жаждущей свободы |
Хранилище Лазури
Запястье
Свирепые гиены Шкурники
Бракенхайд Лощина
Нагрудный доспех Драконьей печи
Нелтарус
Ноги
Братники лавоносца
Нелтарус
Перчатки
Леденящие хватки покорителя
Рубиновые бассейны жизни
Пояс
Пояс из кожи трогга
Ульдаман
Ботинки
Древние ротоходы
Бракенхайд Лощина
Кольцо
Platinum Star Band
Algeth’ar Academy
Аксессуар
Неистовая сигнальная ракета
Пороховая лощина
Аксессуар
Рог Родины
Ульдаман
Кольцо
Eternal Sentry’ s Ring
Ульдаман
Основная рука и левая рука
Вырезанный из гнили тотемный хвостовик
td>
Лощина папоротниковой шкуры
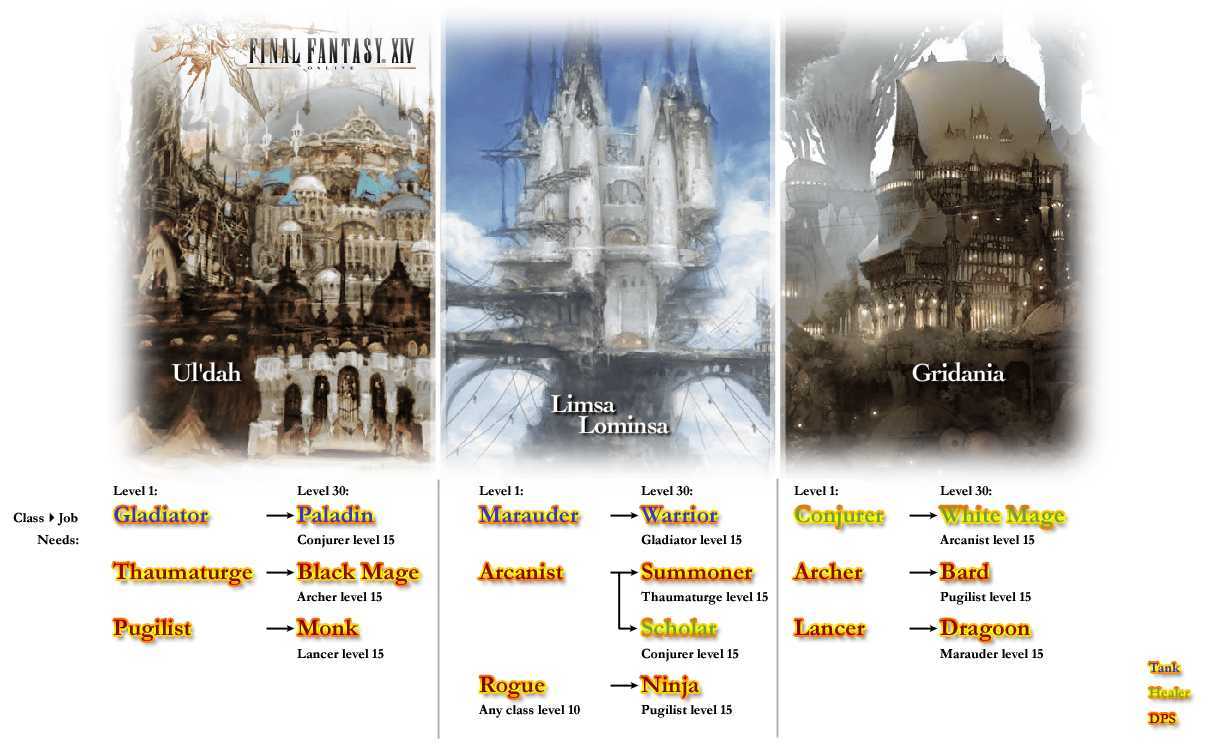
Разблокирование сюжетных линий в Final Fantasy XIV
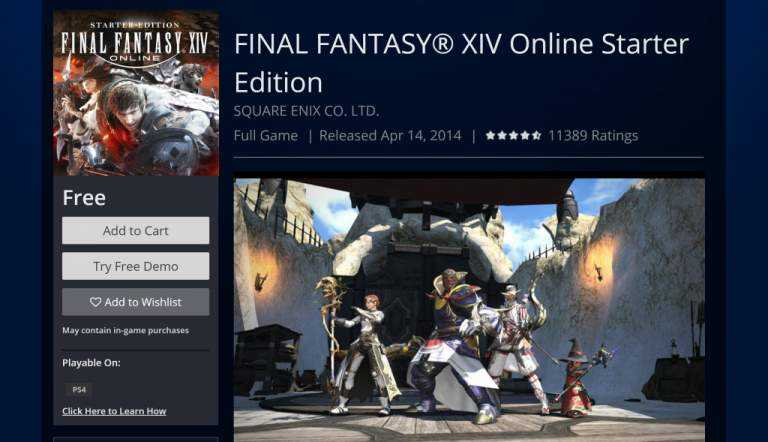
Получение право на участие в прошлых дополнениях в FFXIV требует надлежащей регистрации учетной записи на дочернем сайте Square Enix, Mog Station . Это может немного сбивать с толку, поскольку с момента ее запуска в 2010 году было выпущено несколько разных изданий Final Fantasy XIV . Другой уровень — и платформа, и регион владения должны соответствовать всем программам. Эта система также будет применяться ко всем будущим дополнениям, в том числе к Final Fantasy XIV наконец-то приходит на Xbox. Подводя итог, что необходимо как для реестра, так и для завершения в игре:
Доступ к Stormblood
- Зарегистрируйте любую базовую копию Final Fantasy XIV : A Realm Reborn , Final Fantasy XIV: Starter Edition или оригинал Final Fantasy XIV 1.0
- Зарегистрируйте Final Fantasy XIV: Endwalker для той же платформы и страны, что и основная игра: стандартный ПК с Windows , Steam PC , Mac или PlayStation
- Загрузить патч 6.0.
- Получите 60 уровень на любом боевом задании.
- Пройдите всю основную сюжетную линию вплоть до Heavensward 3.5 quest Дальний край судьбы
Доступ к Shadowbringers
- Зарегистрируйте любую базовую копию Final Fantasy XIV : A Realm Reborn , Final Fantasy XIV: для начинающих. или оригинальную Final Fantasy XIV 1.0
- Зарегистрируйтесь Final Fantasy XIV: Endwalker для той же платформы и страна в качестве базовой игры: стандартный ПК с Windows , Steam ПК , Mac или PlayStation
- Загрузить патч 6.0
- Получите 70 уровень на любом боевом задании.
- Завершите всю основную сюжетную линию вплоть до квеста Stormblood 4.5 Реквием героев
Для владельцев PlayStation все версии консолей имеют одну универсальную лицензию. Это даже включает в себя уже не существующую версию для PlayStation 3, которая по-прежнему будет считаться правом собственности на Final Fantasy XIV на PlayStation 4 и PlayStation 5 . Однако для всех платформ следует дважды проверить, что Endwalker соответствует их региону Final Fantasy XIV
Жителям Африки, Ближнего Востока, Азии и Австралии следует проявлять особую осторожность, поскольку несовместимые европейские и японские копии часто продаются не на том региональном рынке
An Idiot’s Guide Skills/Abilities to Dragoon! | FFXIV Shadowbringers | 5.55
50894
1257
35
00:04:23
30.10.2021

UPDATED VIDEO — 🤍
I mainly want to make these guides to try and find a style for content I’d want to make in the future. Hopefully once Endwalker releases, I can redo this guide and make more for the rest of the classes! Make sure to check out my Twitch as I have been streaming my static’s progression of UCoB and more FFXIV content, and sometimes I stream other games as well. Let me know if I should make any changes and if I missed anything!
Thanks for watching!
Twitter — 🤍
Twitch — 🤍
Music used in the video — 🤍
#FFXIV
FINAL FANTASY XIV 2010-2021 SQUARE ENIX CO., LTD. All Rights Reserved.
Dragonflight Rogue Leveling
The most convenient way to level up your Rogue is doing that as an Outlaw. This spec provides players with simple rotation and decent damage during the leveling process. It also allows you to survive longer and be flexible depending on the situation.
The fastest way to level up is to set up a party of 3 DPS, 1 healer, and 1 tank and run dungeons over and over again. In this case, you spend less time traveling around the world, increasing the amount of exp you gain. This way is only viable if you have a premade party as pugs sometimes can be very slow and face problems during the run.
Another option is to level up via the quests. In this case, there are two expansions that work well. They are Warlords of Draenor and Legion. Zones of these expansions contain a lot of quests packed together, which saves you a lot of time and makes it possible to earn a lot of experience in the shortest amount of time.
Don’t hesitate to spend some gold on the following items as they will ease your life drastically.
- Gunshoes – increase your movement speed on the ground;
- Goblin Glider Kit – having a few in your bags is always helpful;
- Light-Step Hoofplates & Comfortable Rider’s Barding – improve your ground mounts;
- Bear Tartare – killing monsters increases your speed;
- Drums of Deathly Ferocity – a Bloodlust effect;
- Spectral Flask of Power – The old flask will give you a pretty decent stat increase.
Стиль игры и особенности профессии
Если вы еще не выбрали себе профессию, возможно, вам стоит присмотреться к воину.
Воин представляет собой гибрид бойца и танка — у него имеются дополнительные ресурсы и кулдауны для нанесения взрывного урона. Широко известный Fell Cleave навсегда изменил механику класса, но не стоит заблуждаться — воины по-прежнему умеют танковать! Отличительной особенностью воинов является небольшая продолжительность действия защитных эффектов, которая служит дополнительной проверкой опытности игрока.
Изначально воины были бойцами, со временем их роль изменилась. Эффективность воинов в этой роли менялась в зависимости от патча. На данный момент воины обладают сравнительно простой ротацией, но при этом вынуждены применять способности своевременно, с точностью до секунды.
С эстетической точки зрения профессия полностью соответствует своему названию. Воины всегда находятся в гуще событий и первыми попадают под вражеский огонь.
Внимание! Выше мы описали лишь общие особенности профессии. Ее точное положение в рейтинге зависит от патча
Игровая мета постоянно меняется по решению разработчиков, не забывайте следить за обновлениями.
Step 3: How to make Recollection weapons
The third step gives your relic weapon its iconic glow, though the item level stays at 500. This was added in patch 5.35.
To get your Recollection weapon:
- Complete the previous steps listed above.
- Start the repeatable “The Will to Resist” quest from Zlatan in Gangos.
- Turn in six Bitter Memories of the Dying.
The green Bitter Memories of the Dying are rewards from completing level 60 dungeons and as drops from enemies in Bozja. You can also get one Bitter Memory of the Dying a day from completing Leveling Roulette in the Duty Finder. Completing level 60 dungeons with your level unsynced does not reward the memories.
Just like the previous step, you do not need to be playing as the job you want the weapon for in order to get the memories.
Вращение
Вращение для Скрытности может немного отличаться, если вы используете одиночную цель или AoE/Cleave в своей сборке. В любом случае, вам нужно быть в курсе того, какие способности активны, а какие не должны максимально использовать ваш урон. Скрытность обычно процветает благодаря Танцу теней, поэтому ключевым моментом является выбор ваших Способностей, когда он активен.
Помимо этого, знание своего положения по отношению к противнику будет иметь первостепенное значение, когда речь идет об Ударе в спину и Мрачном клинке. Вы захотите наилучшим образом использовать Найти слабости, которые оба применяются, когда вы находитесь позади врага. Таким образом, помимо управления ротацией, вам также необходимо знать свое положение по отношению к вашей цели.
Не принимая во внимание количество прерываний, ваша ротация будет выглядеть примерно так, как в Stealth:
| Последовательность | Название способности |
|---|---|
| 1. | Shadowstrike |
| 2. | Shadow Blades, Symbols of Death и Gloom Blade |
3.
Разрыв
4.
Танец теней или Эхо выговора
5.
Потрошение
6.
Shadowstrike
7.
Секретная техника
8.
Shadowstrike
9.
Потрошение
10.
Vanish и Shadowstrike
11.
Потрошение и повторение шага 10
Некоторые советы
Приложите все усилия, чтобы сотворить Теневые клинки, Символы смерти и Мрачный клинок вместе. Это значительно увеличит ваш урон
Использовать Shadowstrike как можно чаще очень важно. Это ваша основная наносящая урон Способность в режиме Незаметности
Shadow Dance поможет максимально эффективно использовать эту атаку.
Потрошение — ваш основной источник комбо-очков. Используйте это в большинстве случаев для финишера.
Макросы
Как и Outlaw Rogue, в Subtlety не так много макросов. Есть один, который может оказаться весьма полезным. Он будет использовать Shadow Blades и Symbols of Death вместе. При этом вы также захотите, чтобы они были на вашей панели по отдельности, чтобы использовать их самостоятельно, когда это необходимо, поскольку у них нет общего времени восстановления. В основном вы будете использовать этот макрос при начале боев. Макрос будет выглядеть следующим образом на Экране команд макросов:
- /cast Shadow Blades
- /cast Symbols of Death
Не стесняйтесь выбирать любую иконку и имя для этого макроса. Возможно, вы захотите выбрать уникальную, так как не хотите путать ее с каждой отдельной способностью. Еще один отличный мошеннический макрос предназначен для Tricks of the Trade, если вы решите применить к нему Талант. Команда макроса выглядит следующим образом:
/cast Хитрости
Это потрясающий макрос для любого высококлассного игрового процесса. Этот макрос потребует, чтобы вы нацелились на танк. Способность отправит любую агро, которую вы вызовете, на танка, что является плюсом для всех.
Макросы могут быть трудными для создания. Если вам нужна помощь в их создании, ознакомьтесь с нашим специальным руководством.
An Idiot’s Skills/Abilities Guide to DRAGOON | FFXIV
4902
298
21
00:06:00
12.03.2023
Finally, my favorite class. I absolutely love Dragoon. Its playstyle, aesthetic, design, everything. I have been putting off this guide for a while and finally got around to doing it so thanks for sticking around for those who have been waiting!


Discord — 🤍
Twitter — 🤍
Twitch — 🤍
Music used in Video — 🤍
Outro song by my good friend Kara! — 🤍
Song Link — 🤍
My Hotbar Setup — 🤍
Openers (Provided by The Balance 🤍 :
🤍
Timestamps:
0:00 — Intro
0:25 — Main Combo
2:02 — Jump and Life Phase
2:49 — Other Jumps
3:19 — Other Abilities
4:11 — Opener
5:02 — Rotation Notes
5:44 — Outro
#FFXIV
FINAL FANTASY XIV 2010-2023 SQUARE ENIX CO., LTD. All Rights Reserved.
Dragon Gauge
Dragoon’s job gauge shows the remaining duration of a special buff called Blood of the Dragon. It increases the potency of your two abilities – Jump/High Jump and Spineshatter Dive. After the initial use of Blood of the Dragon, you can extend its effect by attacking with two of your weaponskills: Fang and Claw, as well as Wheeling Thrust.
At level 70, you’ll get access to an additional effect associated with Dragon Gauge. It’s called gaze and it’s indicated by the dragon eyes next to your gauge. You can charge this resource with an ability called Mirage Dive. When you get the maximum two stacks, you can use another ability – Geirskogul to transform your Blood of the Dragon buff into the Life of the Dragon. It provides access to some high potency attacks. Life of the Dragon duration can’t be extended, but after it ends, you simply go back to Blood of the Dragon.
Spectral Necromancer
![]()
Attacks:
Absolute Dark II – A massive conal AoE that’ll target about a third of the arena.Twisted Touch – Tankbuster.Chaos Storm – Unavoidable room-wide AoE.Necromancy – Summons four untargetable Necrobomb adds. Each will tether to and attack one player. After a short time they’ll die, but make sure you stack them close to the boss, because…Necroburst – When the Spectral Necromancer finishes casting this, the corpses explode. Back away from them to avoid the sizeable (unmarked) AoEs from these. If the corpses are stacked up together you’ll have plenty of room.Pain Mire – About two thirds of the arena will be marked with AoEs. When these go off, they’l leave behind a damaging pool. Stay out of it.Necromancy (again) – This variant of Necromancy puts actual target markers over the player heads. The necrobombs this time are crawling and will use Death Throes to root each player in place until Necroburst goes off. As far as I can tell, this can’t be avoided: spread out so the Necroburst does not overlap, or you’ll take huge amounts of damage and your healer will become a very active salt mine.Dark Deluge – Circle AoEs are placed under two players. Avoid.
![]()
Pain Mire covers the vast majority of the arena. Do not stand in these or the damage pools left behind.
Strategy:
A bit messy and you’re going to take damage, but not too difficult a Final Fantasy XIV boss. The big one here is Necromancy/Necroburst. With the shambling adds, just pull them all to the center of the arena and then run away when Necroburst is cast. With the crawling adds, split up as much as you can before they root you.
The trickiest part comes later in the fight when both are used in succession. Stack up the shambling adds in the middle, then run out and split up when the crawlers appear. You’ll be rooted in place and will always take one Necroburst explosion from the zombie that roots you. You don’t want to take more: two will drop any squishy class to critical health, and three will outright kill you. As such, stay the hell away from the stacked up corpses, and spread out from your party members to avoid their guaranteed blasts.
That aside, Spectral Necromancer is pretty painless. The difficulty comes in that it’s one of those fights where a single person not knowing the mechanics can wind up getting a bunch of people killed by dragging explosions near to them. As such, you might die once, but most players should get the hang of it pretty quickly.